For English click here
למעבר מתצוגת עריכה לתצוגת קריאה
עמוד ראשי > תעודת האבטחה > התקנת תעודה ב-Android Studio
במערכות ווינדוס האפשרות המומלצת להתקנה היא לפי ההוראות כאן
יש להוריד את התעודה של הספק של נטפרי מפה: https://netfree.link/netfree-ca.crt
💡 אם אתם גולשים על רשת של ספק RL שימו לב להוריד את התעודות מהרשימה שנמצאת במדריך כאן.
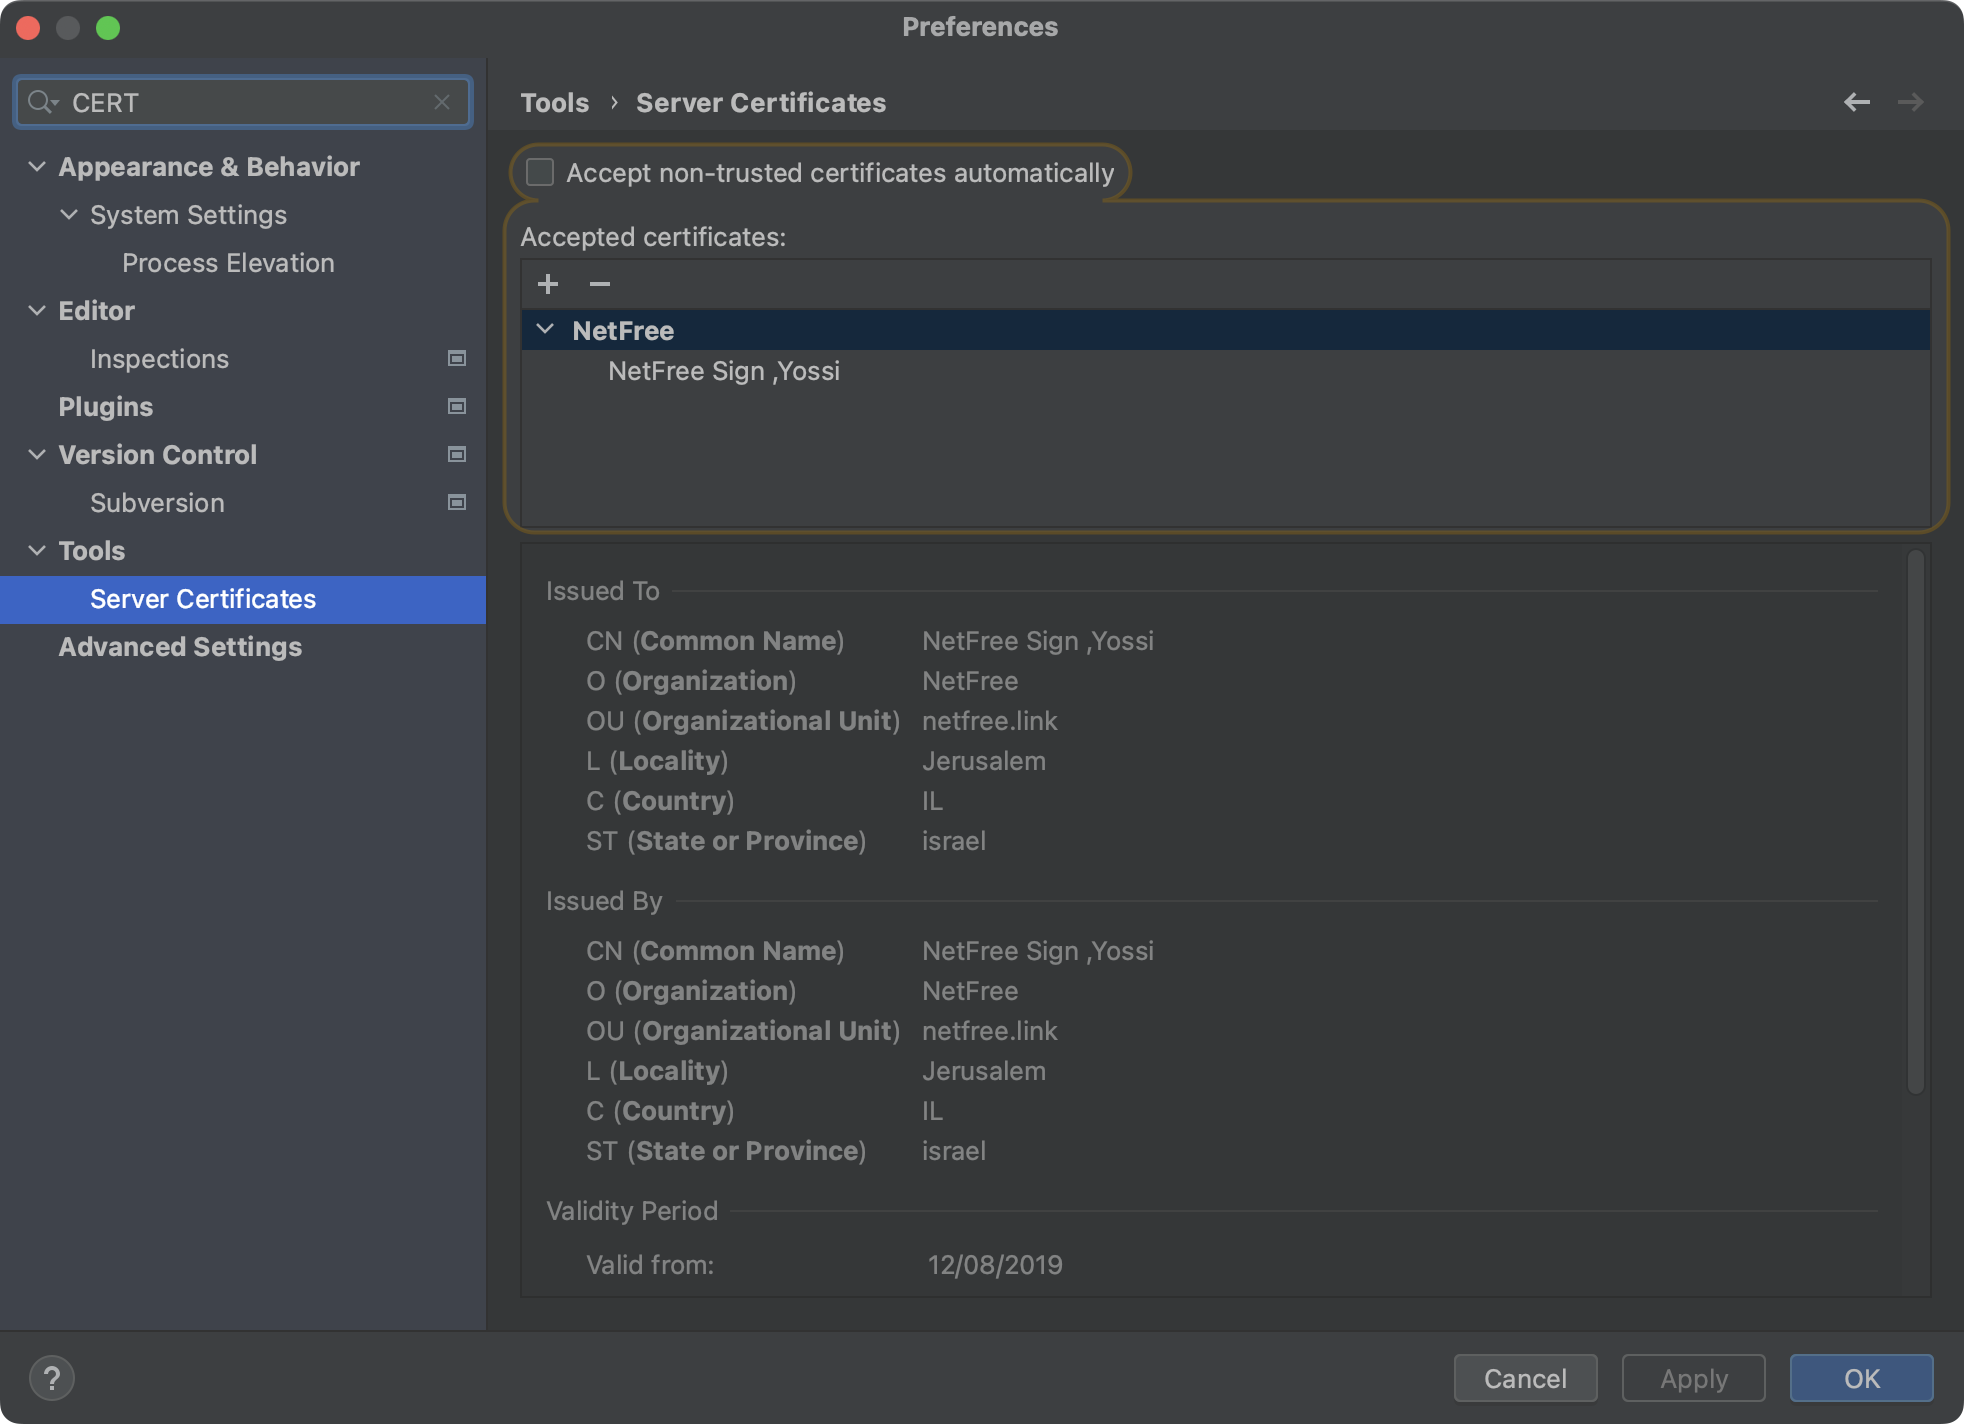
לפתוח את חלון ההגדרות באנדרואיד סטודיו: File > Settings > Tools > Server Certificates,
ללחוץ על הפלוס ולהוסיף את התעודה של הספק מהקובץ שהורדתם.
הערה: פתרון זו ככל הנראה לא מועיל עבור התת-תהליכים של gradle שה-IDE מריץ. מסתבר שתיתקלו בשגיאות של gradle ותצטרכו לפתרון הבא.
אם זה לא מועיל, נסו את הצעד הבא: פתחו את שורת הפקודה במצב מנהל, והדביקו את הפקודה הבאה (לפני כן שנו את מיקום התעודה אם היא לא בכונן C):
"C:\Program Files\Android\Android Studio\jre\bin\keytool" -noprompt -trustcacerts -keystore "C:\Program Files\Android\Android Studio\jre\lib\security\cacerts" -importcert -alias nf -file "C:\ProgramData\NetFree\CA\netfree-ca.crt" -storepass changeit
הערה: עבור הגרסאות החדשות של Android Studio, יש צורך בפקודה מעט שונה, כי מיקומי הקבצים שונו.
הערה: הנה פקודה מתוקנת עבור הגרסאות החדשות של Android Studio, לאחר שמיקומי הקבצים שונו. (נוסה והצליח בתאריך כ"ח תמוז ה'תשפ"ה על גרסה חדשה)
"C:\Program Files\Android\Android Studio\jbr\bin\keytool" -noprompt -trustcacerts -keystore "C:\Program Files\Android\Android Studio\jbr\lib\security\cacerts" -importcert -alias nf -file "C:\ProgramData\NetFree\CA\netfree-ca.crt" -storepass changeit
הערה: אם הפקודה המתוקנת לא עוזרת עבור הגרסאות החדשות של Android Studio, יש לנסות כדלהלן.
יש לפתוח את שורת הפקודה כמנהל, ואז לנווט ל-C:\Program Files\Android\Android Studio\jbr\bin באמצעות הפקודה cd, ולהכניס את הפקודה הבאה (בהנחה שתעודת האבטחה של נטפרי נמצאת במקום שמצויין בפקודה)
keytool -importcert -trustcacerts -alias netfree-ca -file %ProgramData%\NetFree\CA\netfree-ca-last.crt -keystore "C:\Program Files\Android\Android Studio\jbr\lib\security\cacerts" -storepass changeit -noprompt
נוסה על Android Studio Flamingo | 2022.2.1.
הפקודה עבור מחשבי מאק הוא:
sudo keytool -import -trustcacerts -alias netfree-ca -file Downloads/netfree-ca.crt -keystore /Library/Java/JavaVirtualMachines/jdk-11.0.1.jdk/Contents/Home/lib/security/cacerts -storepass changeit
כאשר במקום Downloads/netfree-ca.crtכתבו את הנתיב לתעודת נטפרי שהורד מפה.
הערה: פתרון זו יגרום לשגיאה בעת נסיון להתקין עדכונים ל-IDE. זה נגרם כתוצאה מכך שהתבצע שינוי באחת מקבצי הליבה של התוכנה. כדי להתקין עדכוני תוכנה ל-IDE, מומלץ לעשות גיבוי של הקובץ cacerts לפני הרצת הפעולה. לפני התקנת עדכון שחזרו את הקובץ cacerts מתוך קובץ הגיבוי. אחרי התקנת העידכון תצטרכו להריץ שוב את הפקודות הנ"ל.
אפשרות נוספת היא להוריד את הגירסה החדשה המלאה ולהתקין אותה במקום לשדרג מתוך התוכנה.
שיטה חילופית - שימוש בjdk צד ג'
הערה: פעולה זו יכולה לגרום לבעיות בלתי צפויות והינה על אחריות המשתמש בלבד.
אם מותקן במחשב עוד JDK עם התעודה של נטפרי, אפשר להגדיר שאנדרואיד סטודיו ישתמש ב-JDK חילופית במקום ה-JDK המוטמעת שלו. אופציה זו פותרת את בעיית העדכון שבאופציה הראשונה.
ניתן להוריד jdk חלופי מפה. יש לבחור את הגירסה המתאימה עבור גירסת האנדרואיד סטודיו שלכם. עבור אנדרואיד סטודיו גירסת Jellyfish | 2023.3.1 (נכון לעכשיו) יש להוריד את jdk גירסה 17. מומלץ להתקין בלי לשנות את מיקום ברירת המחדל של ההתקנה.
לאחר ההתקנה יש להוריד את תוכנת התקנת התעודה של נטפרי מדף זה. תוכנת ההתקנה מתקינה תעודות גם על הjdk המותקן במחשב.
לאחר מכן יש להגדיר את ה gradle להשתמש ב jdk שהתקנו.
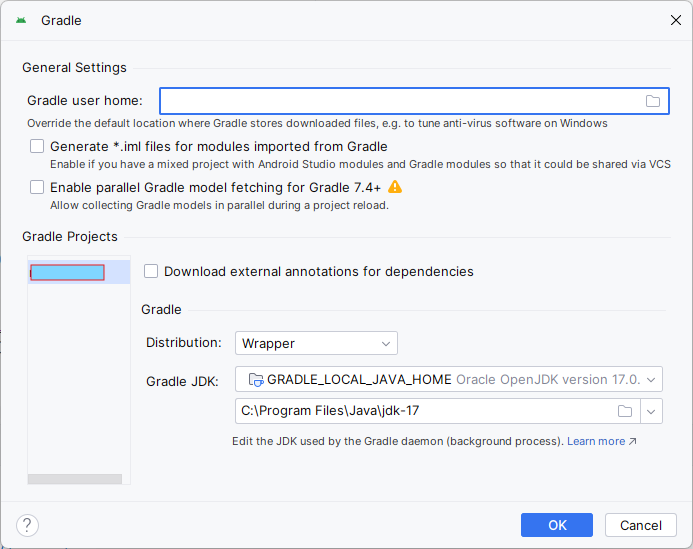
כדי לבצע את זה, לחץ ctrl+shift+a, כתוב את הפקודה: "Change Gradle JDK Location" ואנטר. יפתח חלון שנראה כך:
מתוך תפריט הבחירה שבשורה Gradle JDK ביחרו "add JDK"
בחלון הבא תבחרו במיקום ההתקנה של הjdk החילופית. (בדרך כלל: "C:\Program Files\Java\jdk-17")

